-
Ethical beekeeping places bee health and environmental stewardship above production quotas, ensuring stronger colonies and a sustainable ecosystem.
-
Ethical beekeeping utilizes remote, chemical-free foraging sites and minimal processing to preserve the honey’s natural enzymes and high MGO potency.
-
Through independent lab testing and QR-code traceability, consumers can verify the authenticity and medicinal grade of every batch.
Manuka honey is widely recognized as a premium superfood, prized for its high methylglyoxal (MGO) content and unique antibacterial benefits. However, producing authentic honey from the short-blooming Leptospermum scoparium bush is difficult, especially given the remote terrain of New Zealand.
High demand and a narrow harvest window often lead to industry challenges like bee stress and honey fraud. Ethical beekeeping addresses these issues by prioritizing hive health over yield, ensuring purity and potency.
Pacific Resources International (PRI) has championed these sustainable methods for decades. This article explores how ethical beekeeping remains the gold standard for producing high-quality Manuka honey.
What is Ethical Beekeeping?
Ethical beekeeping is a method that puts the welfare of the honeybee at the center of all operations. It views bees as essential partners in a biological partnership rather than mere tools for production.
This approach minimizes human interference and protects the environment to ensure the bees can thrive for years to come. It operates under the following key principles:
-
Bee welfare first: The natural behaviors and health of the colony take precedence over reaching specific production quotas.
-
Minimal intervention: Beekeepers limit hive inspections to what is strictly necessary. They use gentle techniques to keep stress levels low and provide hives with proper ventilation.
-
Natural pest control: Instead of using synthetic chemicals or harsh pesticides, ethical beekeepers use hygiene and proactive monitoring to manage hive health.
-
Sustainable harvesting: Beekeepers only take the surplus honey. They make sure the bees have enough of their own honey stores to survive the winter without needing artificial sugar syrups.
-
Environmental stewardship: This involves protecting the native New Zealand terrain. Beekeepers place hives in pristine areas to avoid pollution and support local biodiversity.
-
Respect for the ecosystem: Hives are not moved long distances unnecessarily. This local focus helps maintain a balanced environment.
The Importance of Ethical Beekeeping
Ethical beekeeping is essential for safeguarding bee populations and the environments they inhabit. By prioritizing the health of the hive and the ecosystem, these practices ensure a sustainable future for the industry and a superior product for consumers.
-
Protects Bee Populations: Ethical standards protect bees from threats like habitat loss and disease by building stronger, more resilient colonies.
-
Preserves Native Ecosystems: Responsible land management protects New Zealand’s unique flora and maintains environmental balance.
-
Ensures Superior Quality: Ethical biokeeping introduces no contaminants during the process, allowing the honey produced to preserve its natural enzymes, pollen, and bioactive compounds.
-
Supports Industry Sustainability: These methods provide a long-term path for the Manuka industry to meet global demand responsibly.
-
Empowers Consumers: Buyers can trust that their purchase supports both their personal health and the well-being of the planet.
Key Aspects of Ethical Manuka Beekeeping
To produce authentic, high-potency Manuka honey, beekeepers must operate in harmony with nature’s strict timeline. Ethical beekeeping aligns with this requirement as it prioritizes the long-term health of the hive and the purity of the environment over mass production.
1. Strategic Site Selection
Hives are placed in New Zealand’s most remote regions to ensure bees forage almost exclusively on wild Manuka nectar. Ethical beekeepers select only chemical-free lands to protect the bees and prevent honey contamination.
2. Synchronized Blooming Cycles
Beekeepers must time hive placement perfectly with the short summer bloom. By respecting these natural cycles rather than forcing production, they ensure the honey captures the highest natural concentrations of bioactive compounds.
3. Natural Winter Rest
Unlike industrial operations that may overwork colonies, ethical practices allow bees to hibernate and rest naturally during the winter. This preserves the strength of the queen and the vitality of the hive for the following season.
4. Minimal Intervention Processing
To maintain the honey’s integrity, ethical producers use cool-processing and minimal filtration. This keeps the natural enzymes and pollen intact, exactly as the bees produced them.
5. Rigorous Independent Verification
Every batch is lab-tested to verify levels of MGO, DHA, and purity. This transparency ensures that the final product is authentic, monofloral Manuka honey that meets the highest safety and quality standards..
Overcoming Challenges Through Ethical Manuka Beekeeping
While the narrow production window for Manuka honey creates immense commercial pressure, ethical beekeeping transforms these challenges into a commitment to quality.
1. Patience Over Production
While the brief blooming period can tempt operations to rush, ethical beekeeping relies on meticulous planning to align with nature’s timeline without overworking the colonies.
2. Preventing Overharvesting
To avoid bee malnutrition, ethical beekeepers only harvest surplus honey, ensuring the hive retains enough of its own natural food stores to thrive through the winter.
3. Natural Pest Management
Rather than relying on harsh chemicals to combat threats like the Varroa mite, ethical producers use frequent monitoring and natural controls to maintain hive health and honey purity.
4. Combating Habitat Pressure
Ethical beekeepers act as stewards of the land, managing remote sites responsibly to prevent environmental degradation and ensure the Manuka bush remains a sustainable resource.
5. Eliminating Fraud Through Traceability
To protect consumers and manufacturers from industry-wide honey fraud, ethical brands utilize direct sourcing and QR-code technology, allowing customers to verify the authenticity and origin of every batch.
PRI: Healing the World With Every Jar
Ethical beekeeping is the only way to ensure that Manuka honey remains a powerful wellness tool. These practices protect the bees, the land, and the medicinal quality of the honey.
At PRI, we’re committed to following these values to ensure that you receive Manuka honey that’s both effective and sustainable. Since 1987, we have partnered with New Zealand beekeepers who prioritize bee welfare and environmental stewardship.
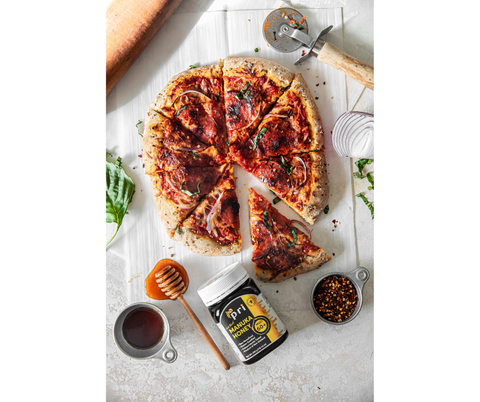
Our Manuka honey is 100% raw, cool-processed, and minimally filtered to preserve its natural potency. For total transparency, every independently certified jar features a QR code, allowing you to trace your batch and verify its MGO, DHA, and purity levels.
Explore the PRI Manuka honey collection today. Experience the goodness of honey produced with integrity and care for the environment.
Frequently Asked Questions About Ethical Beekeeping With PRI
Why is Manuka honey so expensive?
While the price of Manuka honey may seem high, it reflects the rigorous standards required to ensure a pure, potent product. This cost is driven by the extreme scarcity of the Manuka bush, which blooms for only a few weeks in remote regions of New Zealand, and the complex logistics of harvesting in rugged terrain.
Furthermore, unlike mass-produced alternatives, authentic Manuka requires significant investment in independent laboratory testing and ethical beekeeping practices that prioritize hive health over volume.
Is Manuka honey bee-friendly?
Yes, if it’s sourced correctly. PRI ensures that honey is only harvested from surplus stores. This leaves the bees with plenty of food for the winter. Ethical beekeepers focus on colony health and natural behaviors to keep the bees strong.
How do I know if honey is ethical?
Look for brands that offer total transparency. Authentic honey should have clear lab certifications for MGO or UMF levels. Check for QR codes that lead to independent test results. Manuka honey from New Zealand should be traceable back to the beekeeper. PRI provides this level of detail to guarantee that our honey is produced without chemicals or habitat destruction.